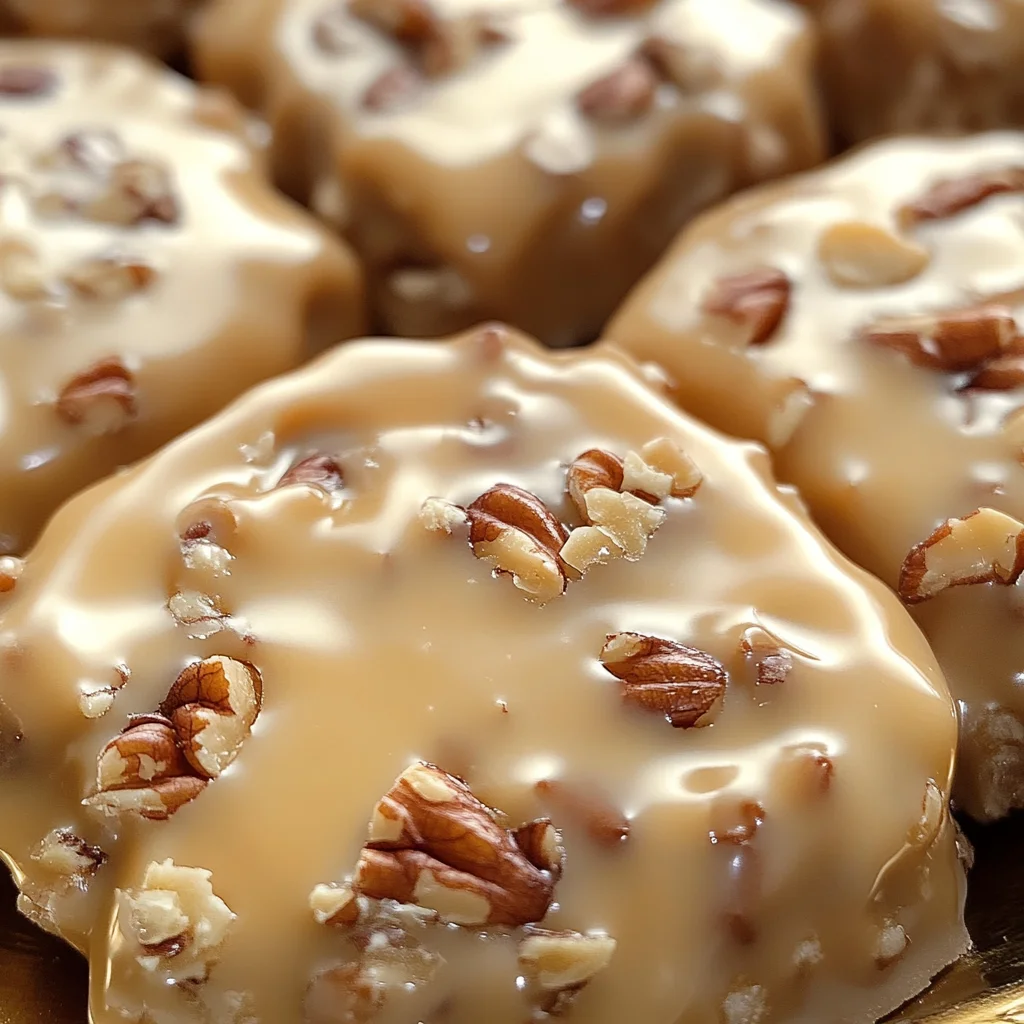
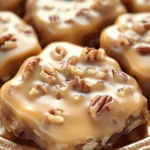
Vanilla Pecan Pralines
If you’re looking for a treat that wraps you in warmth and sweetness, then these Vanilla Pecan Pralines are just what you need. This recipe has been a cherished favorite in my household for years, making appearances during cozy family gatherings and festive celebrations alike. The rich, creamy texture paired with the delightful crunch of pecans makes these pralines a perfect little indulgence for any occasion.
What I love most about these Vanilla Pecan Pralines is how simple yet satisfying they are to make. Whether it’s a busy weeknight or a special family gathering, this recipe will always bring smiles and happy taste buds to the table!
Why You’ll Love This Recipe
- Easy to prepare: With just a few simple steps, you’ll have delicious pralines ready to enjoy!
- Family-friendly: Everyone loves the sweet flavor and crunchy texture—perfect for kids and adults alike.
- Make-ahead convenience: These pralines store well, making them a great option for prepping ahead of time.
- Deliciously unique: The combination of vanilla and pecans creates an irresistible flavor that stands out from typical sweets.
Ingredients You’ll Need
These Vanilla Pecan Pralines call for some simple, wholesome ingredients that you might already have in your pantry. Each one plays a vital role in creating that rich and creamy texture we all adore.
For the Pralines
- 2.5 cups granulated sugar
- 2 cups chopped pecans
- 7 oz evaporated milk
- 0.25 cup butter (cubed)
- 11 oz vanilla chocolate chips (Ghirardelli recommended)
- 4 oz vegan marshmallows creme
- 1 teaspoon vanilla extract
Variations
One of the best things about this recipe is how flexible it can be! Feel free to get creative and adjust it to suit your tastes or what you have on hand.
- Add chocolate: Toss in some dark chocolate chunks for an extra layer of flavor.
- Try different nuts: Swap out pecans for walnuts or almonds for a fun twist.
- Spice it up: Add a pinch of cinnamon or nutmeg to the mixture for a warm, spicy kick.
- Make it festive: Fold in some dried cranberries or raisins for added texture and color.
How to Make Vanilla Pecan Pralines
Step 1: Combine the Base Ingredients
Start by combining the sugar, evaporated milk, and cubed butter in a heavy-bottomed saucepan. This mixture forms the base of your pralines. Cooking over medium heat ensures everything melts together smoothly while stirring constantly helps dissolve the sugar completely.
Step 2: Boil until Perfectly Thickened
Continue cooking until the mixture comes to a gentle boil. At this stage, you’ll want to stop stirring. Allowing it to boil without interference is crucial as it helps achieve that perfect firm-ball stage at 245°F (118°C). Using a candy thermometer here is key!
Step 3: Mix in Chocolate Goodness
Once you’ve reached the right temperature, remove your saucepan from the heat. Stir in those velvety vanilla chocolate chips until they melt into a smooth, creamy blend. This step adds that luscious chocolate flavor we crave!
Step 4: Incorporate Marshmallow Creme and Pecans
Next, mix in the vegan marshmallows creme and vanilla extract until everything is well combined. Then fold in those chopped pecans—this not only gives texture but also enhances that lovely nutty flavor that pairs so well with the sweetness.
Step 5: Shape Your Pralines
Using rounded tablespoons, drop dollops of your mixture onto a parchment-lined baking sheet. This step is where you can feel like an artist! Just let each piece fall freely; they will spread slightly as they cool.
Step 6: Cool Completely
Finally, allow your pralines to cool completely before serving. This patience pays off as it lets them set beautifully into delightful treats that are ready to be enjoyed!
Now you’re all set with a batch of delicious Vanilla Pecan Pralines! Enjoy every bite!
Pro Tips for Making Vanilla Pecan Pralines
Making Vanilla Pecan Pralines can be a delightful experience, and with these tips, you’ll ensure perfect results every time!
- Use a heavy-bottomed saucepan: This helps distribute heat evenly, preventing the sugar from burning and ensuring your pralines cook uniformly.
- Invest in a quality candy thermometer: Accurate temperature readings are crucial for achieving the firm-ball stage. This will guarantee your pralines have the right texture.
- Stir consistently until boiling: Stirring while heating ensures that the sugar dissolves completely, which is vital for achieving that smooth, creamy consistency.
- Let them cool completely: Allowing your pralines to cool fully on the baking sheet ensures they set properly and maintain their shape when served.
- Store in an airtight container: To keep your pralines fresh and delicious, store them in an airtight container at room temperature.
How to Serve Vanilla Pecan Pralines
Serving Vanilla Pecan Pralines is all about presentation and pairing them with complementary flavors. Here are some ideas to make your dessert stand out!
Garnishes
- Chopped pecans: Sprinkle some extra chopped pecans on top of each praline for added crunch and a rustic look.
- Drizzle of dairy-free chocolate: A light drizzle of melted dairy-free chocolate can elevate the visual appeal and add an extra layer of rich flavor.
Side Dishes
- Fresh fruit salad: A refreshing fruit salad with seasonal fruits adds a light contrast to the rich sweetness of the pralines, making for a balanced dessert experience.
- Vegan vanilla ice cream: Serve alongside a scoop of vegan vanilla ice cream to create a delightful contrast of textures and temperatures that enhances the overall flavor profile.
- Coffee or herbal tea: Pairing these pralines with a warm cup of coffee or herbal tea can perfectly balance the sweetness while providing a comforting end to any meal.
- Coconut whipped cream: This light, airy topping adds a creamy texture that complements the nutty flavors of your pralines beautifully.
Enjoy creating and serving these delightful Vanilla Pecan Pralines! They’re sure to become a favorite treat amongst friends and family.
Make Ahead and Storage
These Vanilla Pecan Pralines are perfect for meal prep! You can whip them up in advance for gatherings, holidays, or just to have a sweet treat on hand. Here’s how to store and preserve them.
Storing Leftovers
- Keep the pralines in an airtight container at room temperature.
- They will stay fresh for about a week.
- For longer freshness, consider refrigerating them; just be sure to let them come to room temperature before enjoying.
Freezing
- Place the cooled pralines in a single layer on a baking sheet, freeze until solid, then transfer to a freezer-safe bag.
- They can be frozen for up to three months.
- When ready to eat, let them thaw in the fridge or at room temperature.
Reheating
- These pralines are best enjoyed at room temperature.
- If you prefer them slightly warm, you can microwave them for about 10 seconds—just enough to soften without melting.
FAQs
If you have questions about making these delightful treats, you’re not alone!
Can I use other nuts instead of pecans for Vanilla Pecan Pralines?
Absolutely! While pecans add a wonderful flavor and crunch, feel free to substitute with walnuts or almonds based on your preference.
How do I know when my Vanilla Pecan Pralines are done?
For perfect pralines, look for a firm-ball stage at 245°F (118°C) on your candy thermometer. This ensures they set correctly while remaining creamy.
Are Vanilla Pecan Pralines gluten-free?
Yes! All the ingredients in this recipe are naturally gluten-free, making it a great treat for those with dietary restrictions.
Can I make Vanilla Pecan Pralines vegan?
Yes! This recipe already uses vegan marshmallows creme and can easily be made dairy-free by using plant-based butter and chocolate chips.
Final Thoughts
I hope you find joy in making these Vanilla Pecan Pralines as much as I do! Their rich flavor and delightful texture make them an irresistible treat that’s perfect for sharing—or keeping all to yourself. Enjoy creating these little bites of happiness, and don’t hesitate to put your own twist on them. Happy cooking!
Vanilla Pecan Pralines
Experience the delightful warmth of Vanilla Pecan Pralines, a sweet treat that is perfect for any occasion. This recipe brings together a rich, creamy texture with the satisfying crunch of pecans, making it a beloved favorite in many households. Easy to prepare and irresistibly delicious, these pralines are not just a dessert but a way to create joyful memories during family gatherings or festive celebrations. The combination of vanilla and nuts creates a uniquely sweet flavor that stands out, ensuring smiles and happy taste buds around your table.
- Prep Time: 15 minutes
- Cook Time: 20 minutes
- Total Time: 35 minutes
- Yield: Approximately 24 pralines 1x
- Category: Dessert
- Method: Candy Making
- Cuisine: American
Ingredients
- 2.5 cups granulated sugar
- 2 cups chopped pecans
- 7 oz evaporated milk
- 0.25 cup butter (cubed)
- 11 oz vanilla chocolate chips (vegan-friendly)
- 4 oz vegan marshmallow crème
- 1 teaspoon vanilla extract
Instructions
- In a heavy-bottomed saucepan, combine the sugar, evaporated milk, and cubed butter over medium heat. Stir continuously until the mixture is smooth.
- Allow the mixture to boil gently without stirring until it reaches 245°F (118°C) on a candy thermometer.
- Remove from heat and stir in the vanilla chocolate chips until melted and blended.
- Mix in the vegan marshmallow crème and vanilla extract, followed by folding in the chopped pecans.
- Drop rounded tablespoons of the mixture onto a parchment-lined baking sheet.
- Let cool completely before serving.
Nutrition
- Serving Size: 1 praline (30g)
- Calories: 130
- Sugar: 18g
- Sodium: 15mg
- Fat: 5g
- Saturated Fat: 2g
- Unsaturated Fat: 3g
- Trans Fat: 0g
- Carbohydrates: 19g
- Fiber: 1g
- Protein: 1g
- Cholesterol: 5mg