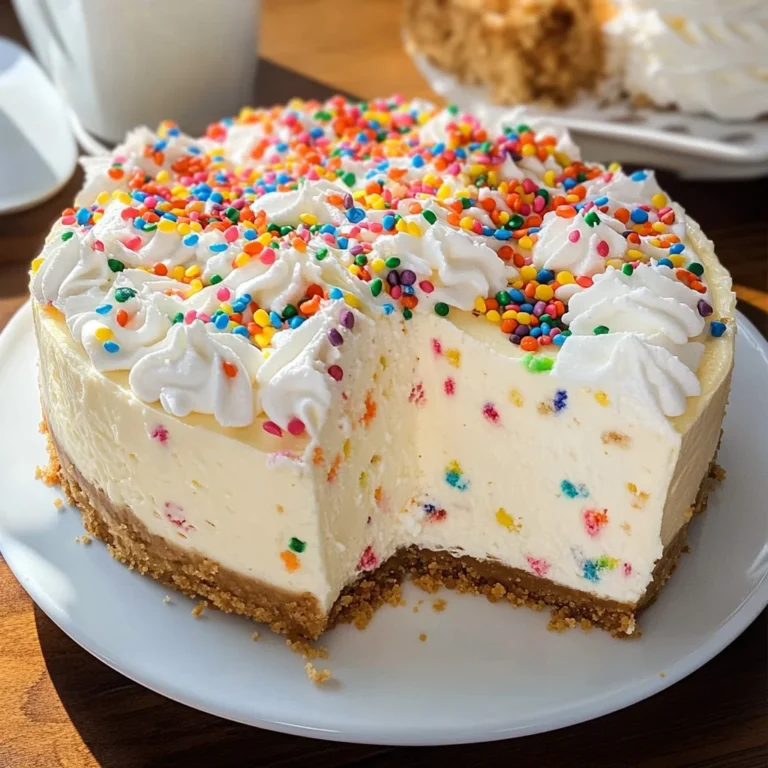
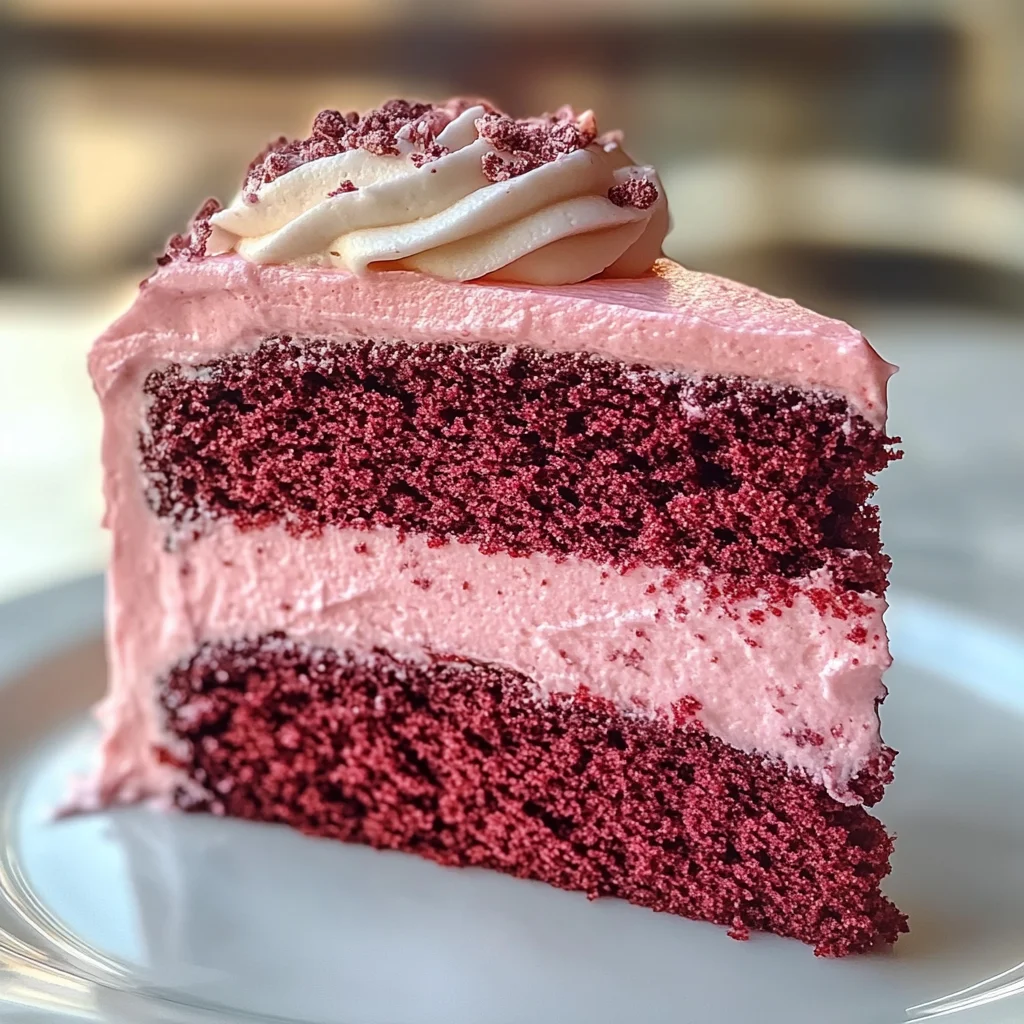
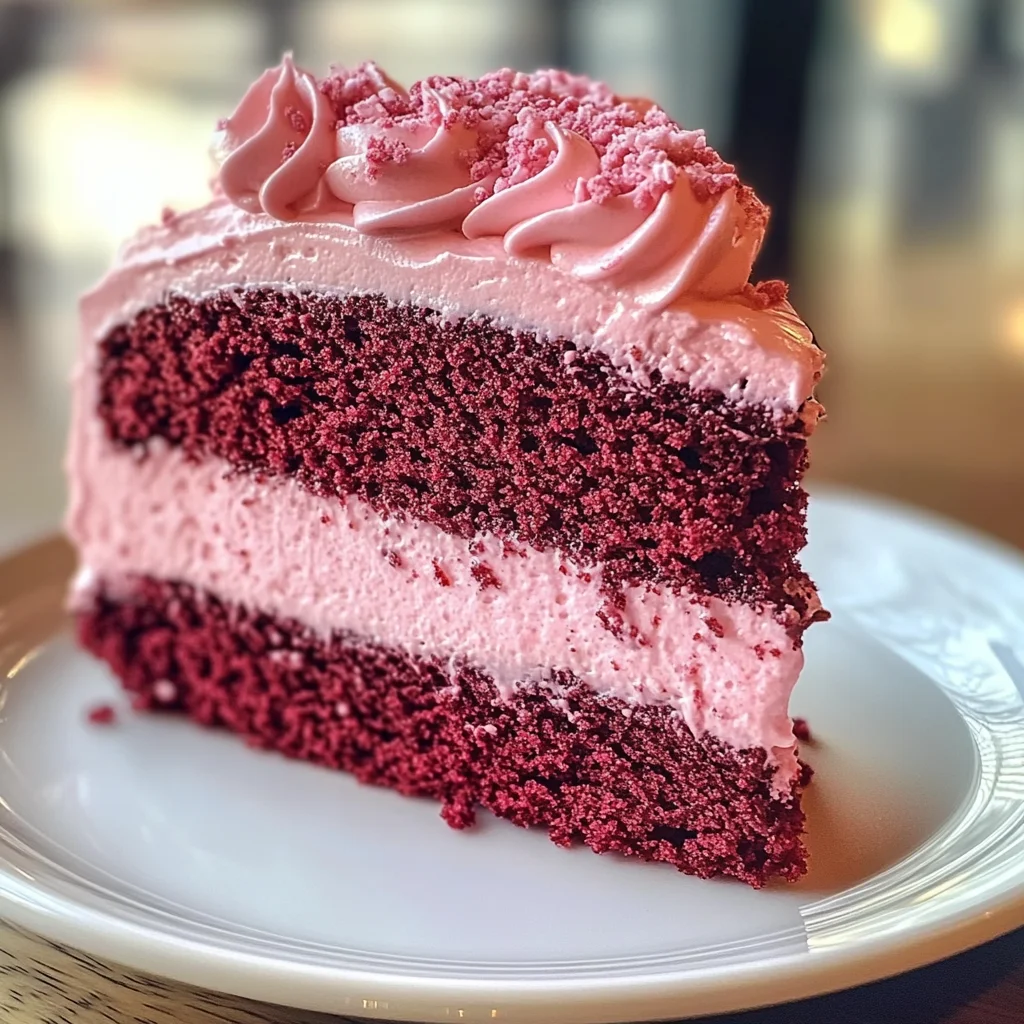
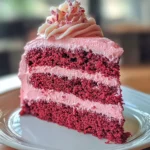
Mother’s Day Pink Velvet Cake
Celebrate the special women in your life with this enchanting Mother’s Day Pink Velvet Cake. If you’re looking for a dessert that’s as delightful to the eyes as it is to the taste buds, this cake is the one! Its soft, fluffy layers infused with cocoa and vanilla create a delightful treat that can brighten up any occasion, from busy weeknights to family gatherings. Topped with a creamy frosting, this cake is perfect for making sweet memories filled with love and joy.
Why You’ll Love This Recipe
- Easy to make: With straightforward steps, even novice bakers can whip up this beautiful cake without stress.
- Family-friendly appeal: Everyone loves a slice of this vibrant pink velvet cake—children and adults alike will indulge in its deliciousness!
- Perfect for any occasion: While it’s ideal for Mother’s Day, you can serve it at birthdays, holidays, or just because you want something sweet.
- Customizable flavors: Add your twist by using yogurt instead of buttermilk or try some almond extract for a nutty hint.
- Make-ahead convenience: Bake in advance and frost just before serving, making it easier to enjoy your time with loved ones.
Ingredients You’ll Need
Gather these simple, wholesome ingredients to bring your Mother’s Day Pink Velvet Cake to life. Each ingredient plays an important role in creating that soft texture and rich flavor!
For the Cake
- 2 ½ cups cake flour
- 1 ¾ cups granulated sugar
- ½ cup unsweetened cocoa powder
- 1 tbsp baking powder
- ½ tsp salt
- ¾ cup unsalted butter, softened
- 4 large eggs (room temperature)
- 1 cup buttermilk
- 2 tsp pure vanilla extract
- Red food coloring (to achieve desired pink hue)
For the Frosting
- Cream cheese frosting (for topping)
Variations
This recipe is quite flexible! Here are some fun variations you can try:
- Swap the dairy: Use yogurt instead of buttermilk for a tangy twist that still keeps the cake moist.
- Add some zest: Incorporate lemon or orange zest for a refreshing citrus flavor that pairs beautifully with cream cheese frosting.
- Mix in fruit: Fold in fresh berries into the batter before baking for added bursts of flavor and color.
- Change the frosting: Try using whipped coconut cream instead of cream cheese frosting for a lighter option.
How to Make Mother’s Day Pink Velvet Cake
Step 1: Preheat Your Oven
Start by preheating your oven to 350°F (175°C). Greasing and flouring two 9-inch round cake pans will help ensure that your cakes release easily after baking. This step is crucial for achieving those beautiful layers!
Step 2: Prepare Your Dry Ingredients
In a mixing bowl, whisk together the cake flour, cocoa powder, baking powder, and salt. This helps combine all your dry ingredients evenly so every bite has consistent flavor. Plus, whisking aerates the flour, making your cake light and fluffy!
Step 3: Cream Butter and Sugar
In another bowl, cream together your softened butter and granulated sugar until it’s light and fluffy—about three minutes will do! This step incorporates air into the mixture which helps create that airy texture we all love in cakes.
Step 4: Incorporate Eggs
Beat in each egg one at a time. Ensuring each egg is well incorporated will give your batter uniformity and strength. The eggs also provide moisture that makes our cake tender.
Step 5: Add Wet Ingredients
Now it’s time to add buttermilk, vanilla extract, and red food coloring into your mix. Stir until everything is combined smoothly. The red food coloring gives our cake its signature pink color while adding richness!
Step 6: Combine It All Together
Gradually fold in your dry ingredients until smooth. Be gentle here; overmixing can lead to a dense cake rather than a light one. You want everything just blended together beautifully!
Step 7: Bake Your Cakes
Divide the batter between the prepared pans. Bake them in your preheated oven for about 25-30 minutes or until a toothpick comes out clean when inserted into the center. The smell will be heavenly!
Step 8: Cool Down
Allow your cakes to cool in the pans for about ten minutes before transferring them to wire racks to cool completely. Cooling is key so that they don’t get too soggy when you frost them.
Step 9: Frosting Time!
Once completely cooled, it’s time to frost with cream cheese frosting! Spread it generously between layers and on top of your beautiful pink velvet cakes. Enjoy each slice knowing you’ve created something truly special!
Pro Tips for Making Mother’s Day Pink Velvet Cake
Baking a cake can be a delightful experience, and with these tips, you’ll elevate your Pink Velvet Cake to a whole new level!
-
Use room temperature ingredients: Ensuring that your butter, eggs, and buttermilk are at room temperature helps them blend smoothly into the batter, resulting in a lighter and fluffier cake.
-
Don’t overmix the batter: Mixing just until combined prevents overdevelopment of gluten in the flour, which keeps your cake tender and soft.
-
Check for doneness wisely: Instead of relying solely on time, insert a toothpick into the center of the cakes. If it comes out clean or with a few moist crumbs, it’s ready—this ensures your cakes don’t dry out.
-
Cool completely before frosting: Allowing your cakes to cool fully before applying frosting prevents melting and sliding, giving you beautifully layered and decorated results.
-
Experiment with colors: Don’t hesitate to adjust the amount of red food coloring to achieve your desired pink hue; this allows for personalization and makes the cake uniquely yours.
How to Serve Mother’s Day Pink Velvet Cake
Presenting your Mother’s Day Pink Velvet Cake beautifully can enhance its appeal at any gathering! Here are some ideas to make it shine on your table.
Garnishes
- Fresh berries: Placing strawberries or raspberries on top adds a pop of color and a refreshing tartness that complements the sweetness of the cake.
- Edible flowers: A few delicate edible flowers can create an elegant look, making the cake feel extra special for Mother’s Day.
- Chocolate shavings: Sprinkling dark chocolate shavings over the frosting gives an attractive contrast in color and adds rich flavor notes.
Side Dishes
- Vanilla ice cream: A scoop of vanilla ice cream adds a creamy element that contrasts perfectly with the fluffy cake.
- Fruit salad: A vibrant fruit salad offers a light and refreshing side that balances out the richness of the cake.
- Whipped coconut cream: Light and airy, whipped coconut cream is an excellent dairy-free alternative to traditional whipped cream that pairs wonderfully with the texture of the cake.
- Mint tea: A warm cup of mint tea provides a soothing beverage option that complements dessert well without overpowering its flavors.
With these serving suggestions, your Mother’s Day Pink Velvet Cake will not only taste divine but also look stunning on your table! Enjoy creating memorable moments filled with love and laughter.
Make Ahead and Storage
This Mother’s Day Pink Velvet Cake is perfect for meal prep, allowing you to enjoy delicious cake without the last-minute rush. With proper storage techniques, you can savor this delightful dessert over a few days or even longer!
Storing Leftovers
- Store leftover cake in an airtight container at room temperature for up to 2 days.
- For longer freshness, refrigerate the cake. It will stay good for about a week.
- Ensure that any frosted portions are covered with plastic wrap to prevent drying.
Freezing
- Wrap each layer of cooled cake tightly in plastic wrap and then in aluminum foil.
- Freeze the layers for up to 3 months.
- For frosted cakes, place them in the freezer until the frosting hardens; then wrap securely.
Reheating
- To thaw, transfer the frozen cake to the refrigerator overnight.
- If you prefer to enjoy it warm, microwave individual slices for about 10-15 seconds on medium power.
FAQs
Here are answers to some common questions about making this wonderful cake!
Can I make the Mother’s Day Pink Velvet Cake ahead of time?
Yes! You can bake the cake layers in advance and store them in the fridge or freezer until you’re ready to frost and serve.
What can I use instead of buttermilk in the Mother’s Day Pink Velvet Cake?
You can substitute buttermilk with yogurt or add a splash of vinegar to regular milk for a similar effect.
How do I achieve the perfect pink color for my Mother’s Day Pink Velvet Cake?
Adjust the amount of red food coloring based on your desired hue; start with a small amount and gradually add more until you reach your preferred shade.
What kind of frosting pairs best with Mother’s Day Pink Velvet Cake?
Cream cheese frosting beautifully complements this cake, but feel free to try other flavors like buttercream or whipped cream!
Can I add fruit toppings to my Mother’s Day Pink Velvet Cake?
Absolutely! Fresh fruit such as strawberries or raspberries adds a refreshing contrast and enhances its visual appeal.
Final Thoughts
This Mother’s Day Pink Velvet Cake is truly special not just for its gorgeous appearance but also for the sweet moments it creates. Whether you’re celebrating with your family or treating yourself, I hope you find joy in every slice. Enjoy baking this delightful recipe and share it with those you love—happy baking!
Mother’s Day Pink Velvet Cake
Indulge in the charm of this Mother’s Day Pink Velvet Cake, a perfect blend of soft cocoa and vanilla flavors. With its vibrant pink hue and fluffy texture, it’s an eye-catching dessert that will delight your loved ones. This cake is not only easy to make, but it’s also family-friendly—appealing to both kids and adults alike. Whether you’re celebrating a special occasion or simply treating yourself, this cake is sure to create sweet memories filled with love. Top it with creamy frosting for an extra touch of indulgence!
- Prep Time: 30 minutes
- Cook Time: 30 minutes
- Total Time: 1 hour
- Yield: Approximately 12 servings 1x
- Category: Dessert
- Method: Baking
- Cuisine: American
Ingredients
- 2 ½ cups cake flour
- 1 ¾ cups granulated sugar
- ½ cup unsweetened cocoa powder
- 1 tbsp baking powder
- ½ tsp salt
- ¾ cup unsalted butter, softened
- 4 large eggs (room temperature)
- 1 cup yogurt
- 2 tsp pure vanilla extract
- Red food coloring
Instructions
- Preheat oven to 350°F (175°C). Grease and flour two 9-inch round cake pans.
- In a bowl, whisk together cake flour, cocoa powder, baking powder, and salt.
- In another bowl, cream together softened butter and sugar until light and fluffy.
- Beat in eggs one at a time until fully incorporated.
- Add yogurt, vanilla extract, and red food coloring; mix until smooth.
- Gradually fold in dry ingredients until just combined.
- Divide batter between prepared pans and bake for 25-30 minutes or until a toothpick comes out clean.
- Cool cakes in pans for 10 minutes before transferring them to wire racks to cool completely.
- Frost with cream cheese frosting once cooled.
Nutrition
- Serving Size: 1 serving
- Calories: 340
- Sugar: 36g
- Sodium: 280mg
- Fat: 15g
- Saturated Fat: 9g
- Unsaturated Fat: 6g
- Trans Fat: 0g
- Carbohydrates: 50g
- Fiber: <1g
- Protein: 3g
- Cholesterol: 95mg