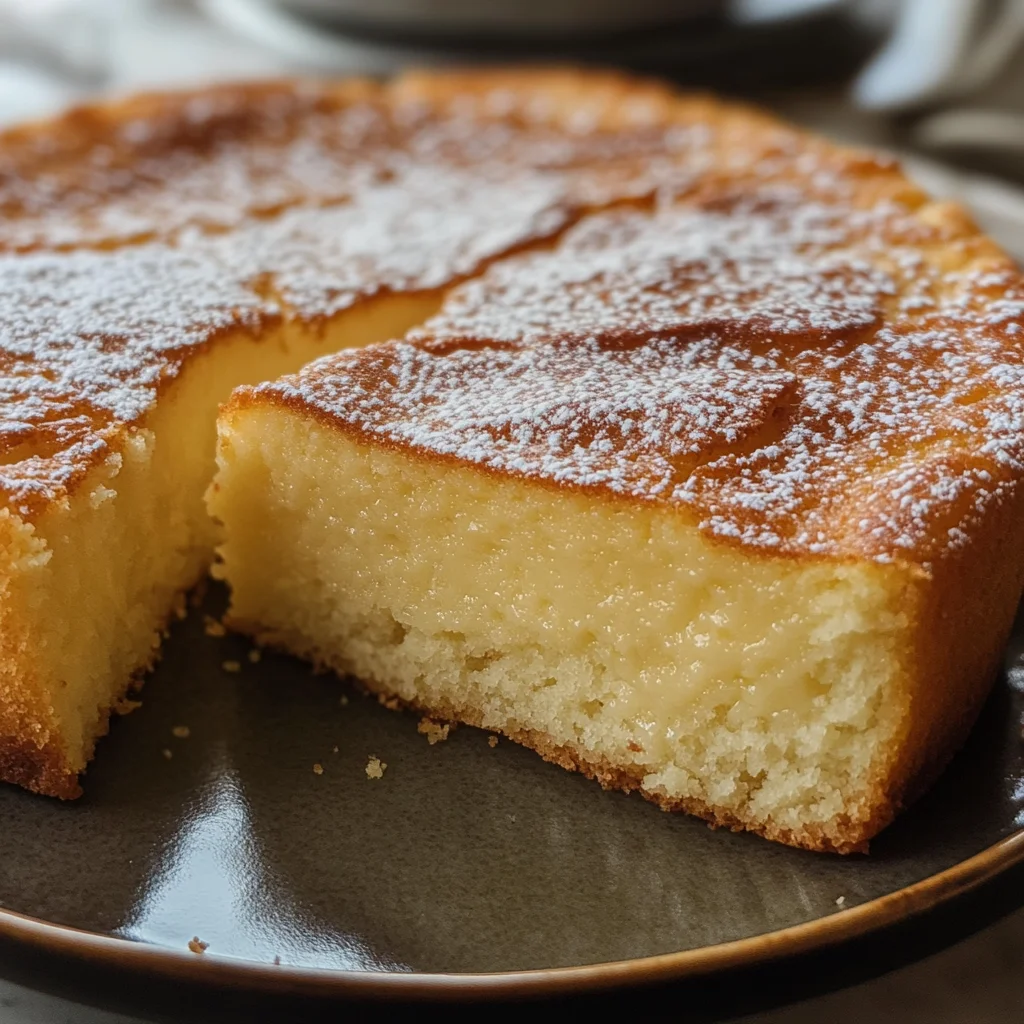
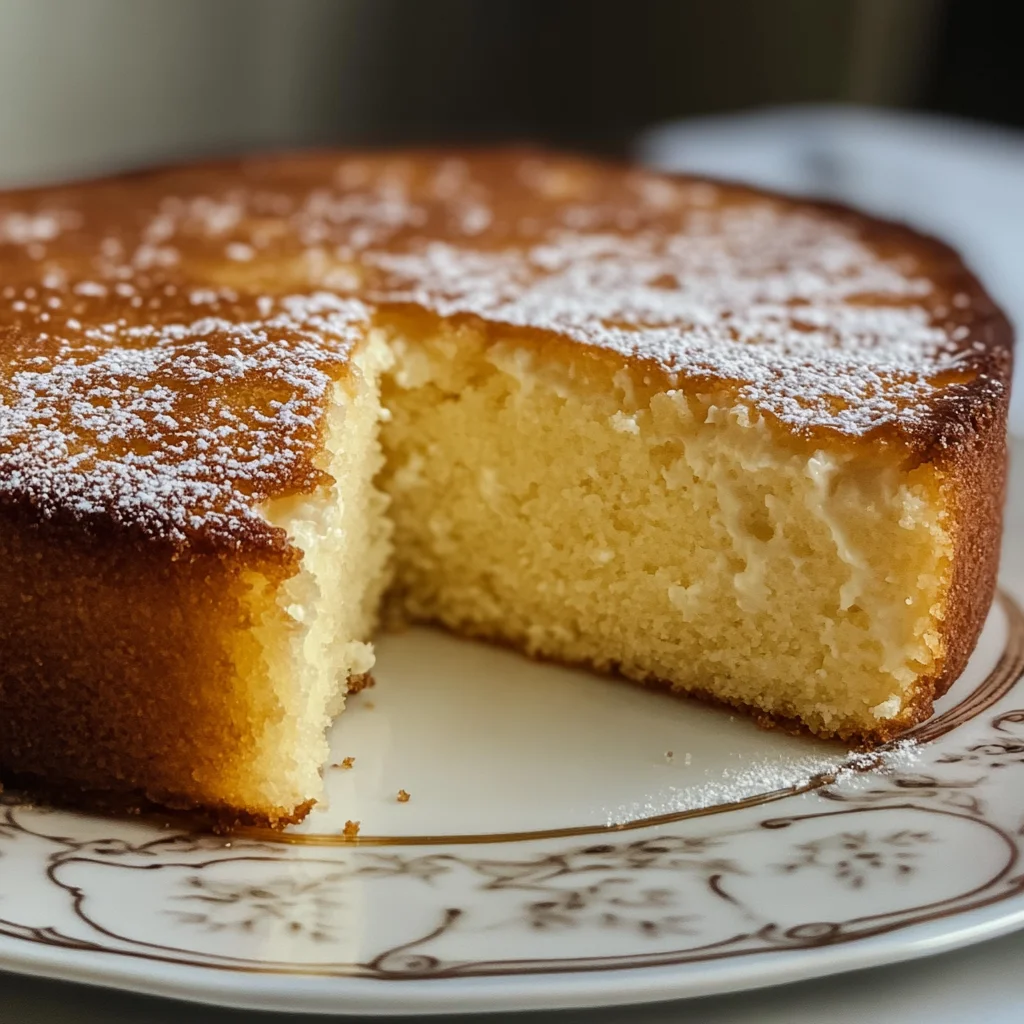
MIGLIACCIO: RICOTTA AND SEMOLINA CAKE
If you’re looking for a dessert that feels like a warm hug, look no further than MIGLIACCIO: RICOTTA AND SEMOLINA CAKE. This delightful cake is a true Italian treasure, combining the creaminess of ricotta cheese with the unique texture of semolina. It’s perfect for any occasion, whether you’re celebrating a family gathering or just want to treat yourself after a long week. The best part? It’s simple enough to whip up on busy weeknights!
This recipe holds a special place in my heart because it brings together flavors and textures that are both comforting and nostalgic. Every bite melts in your mouth and leaves you wanting more. Trust me; once you try this cake, you’ll want to share it with friends and family!
Why You’ll Love This Recipe
- Easy to make: With just a few simple steps, you can have this delicious cake ready to enjoy.
- Family-friendly: Kids and adults alike will love the creamy texture and sweet flavor.
- Versatile treat: Perfect for festive occasions or cozy weeknight desserts.
- Make-ahead option: You can prepare it in advance, making it great for gatherings.
Ingredients You’ll Need
This recipe calls for simple, wholesome ingredients that are easy to find! Here’s what you’ll need to create your own MIGLIACCIO: RICOTTA AND SEMOLINA CAKE.
For the Cake
- 1 cup ricotta cheese
- 1 cup semolina flour
- 1 cup sugar
- 2 cups milk
- 3 large eggs
- 1 teaspoon vanilla extract
- 1 teaspoon baking powder
- Zest of 1 lemon
Variations
One of the best things about this recipe is how flexible it is! Feel free to mix and match ingredients based on your preferences or what you have on hand.
- Add some fruit: Toss in some fresh berries or sliced bananas for added sweetness and flavor.
- Try different extracts: Experiment with almond or lemon extract instead of vanilla for a fun twist.
- Gluten-free option: Substitute semolina flour with a gluten-free flour blend for those with dietary restrictions.
- Top it off: Serve with whipped coconut cream or a sprinkle of powdered sugar for an extra touch.
How to Make MIGLIACCIO: RICOTTA AND SEMOLINA CAKE
Step 1: Preheat Your Oven
Start by preheating your oven to 350°F (175°C). This step is crucial because it ensures that your cake bakes evenly and rises beautifully.
Step 2: Mix the Wet Ingredients
In a large bowl, combine the ricotta cheese, milk, eggs, vanilla extract, and lemon zest. Mix well until smooth. This mixture creates the creamy base that makes the cake so delightful.
Step 3: Combine Dry Ingredients
In another bowl, whisk together the semolina flour, sugar, and baking powder. Mixing these dry ingredients separately helps distribute the baking powder evenly throughout your cake batter.
Step 4: Bring It All Together
Gradually add the dry mixture into the wet mixture. Stir until just combined – be careful not to overmix! This will ensure your cake stays light and fluffy.
Step 5: Bake the Cake
Pour the batter into a greased cake pan and bake for about 60 minutes or until golden brown. The aroma that fills your kitchen during baking is simply heavenly!
Step 6: Cool and Serve
Once done, let the cake cool in the pan for about 15 minutes before transferring it to a wire rack. Enjoy it warm or at room temperature—either way, it’s sure to impress!
Now that you have all the steps laid out, I can’t wait for you to try making this MIGLIACCIO: RICOTTA AND SEMOLINA CAKE! It’s sure to become a favorite in your home as it has in mine!
Pro Tips for Making MIGLIACCIO: RICOTTA AND SEMOLINA CAKE
Making MIGLIACCIO is a breeze, especially with a few helpful tips to guide you along the way!
-
Use fresh ricotta: Fresh ricotta enhances the flavor and texture of your cake. It provides a creamier consistency, which is essential for that melt-in-your-mouth experience.
-
Sift your semolina: Sifting semolina before adding it to the mixture helps to eliminate any clumps and ensures a smoother batter. This results in an even texture throughout the cake.
-
Allow to cool completely: After baking, let your migliaccio cool completely in the pan. This helps it set properly and makes it easier to slice without crumbling.
-
Experiment with flavors: Don’t hesitate to add a splash of vanilla extract or a hint of lemon zest to elevate the flavors. These additions can enhance the overall taste profile and make each bite unforgettable.
-
Serve chilled: For an even more refreshing treat, refrigerate your migliaccio for a few hours before serving. Chilled slices are incredibly satisfying, especially on warm days.
How to Serve MIGLIACCIO: RICOTTA AND SEMOLINA CAKE
Presentation is key when it comes to serving MIGLIACCIO! This delightful cake can be enjoyed in various ways that highlight its creamy texture and rich flavors.
Garnishes
- Powdered sugar: A light dusting of powdered sugar on top adds a touch of sweetness and visual appeal.
- Fresh berries: Adding a handful of fresh strawberries or blueberries not only enhances the flavor but also adds a pop of color that makes your plate look inviting.
- Mint leaves: A few sprigs of fresh mint can offer a refreshing contrast and make your presentation feel extra special.
Side Dishes
- Fruit salad: A simple mix of seasonal fruits complements the richness of the cake while adding freshness. Choose fruits like melon, pineapple, or citrus for vibrant flavor.
- Yogurt parfait: A creamy yogurt parfait layered with granola and fruit can balance out the dense texture of migliaccio while adding nutritional benefits.
- Coffee or herbal tea: Pairing this cake with a warm beverage like coffee or herbal tea creates a cozy atmosphere perfect for enjoying dessert.
- Citrus sorbet: A scoop of citrus sorbet can provide a zesty contrast to the sweet cake, making each bite feel light and refreshing.
Enjoy crafting this delightful dessert and sharing it with loved ones! The combination of flavors and textures will surely make your gathering memorable.
Make Ahead and Storage
Migliaccio: Ricotta and Semolina Cake is perfect for meal prep! This cake stays delicious for several days, making it an excellent choice for busy weeks or festive gatherings.
Storing Leftovers
- Allow the cake to cool completely before storing.
- Wrap individual slices in plastic wrap or aluminum foil.
- Place wrapped slices in an airtight container to keep them fresh.
- Store in the refrigerator for up to 5 days.
Freezing
- Wrap the entire cake tightly in plastic wrap, then in aluminum foil.
- Alternatively, freeze individual slices wrapped separately.
- Label with the date and store in the freezer for up to 3 months.
- Ensure it’s fully thawed in the refrigerator before serving.
Reheating
- Preheat your oven to 350°F (175°C).
- Place slices on a baking sheet and cover with foil.
- Heat for about 10-15 minutes until warmed through.
- For a quicker option, microwave on medium power for about 30 seconds.
FAQs
If you have questions about making Migliaccio: Ricotta and Semolina Cake, you’re not alone! Here are some common queries.
Can I use a different type of cheese in Migliaccio: Ricotta and Semolina Cake?
Yes! While ricotta is traditional, you can experiment with mascarpone or cottage cheese. Just ensure they are creamy to maintain the cake’s texture.
How do I know when my Migliaccio: Ricotta and Semolina Cake is done?
The cake is done when it has risen slightly and a toothpick inserted into the center comes out clean. It should also have a golden-brown top.
Can I make Migliaccio: Ricotta and Semolina Cake dairy-free?
Absolutely! Substitute ricotta with a dairy-free cheese alternative like almond or cashew cream cheese to create a delicious vegan version.
What can I serve with Migliaccio: Ricotta and Semolina Cake?
This cake pairs wonderfully with fresh fruits, a dusting of powdered sugar, or even a dollop of non-dairy whipped cream for added indulgence!
How long does Migliaccio: Ricotta and Semolina Cake last?
When stored properly in the refrigerator, it can last up to 5 days. If frozen, it maintains its quality for about 3 months.
Final Thoughts
I hope you feel inspired to try making this delightful Migliaccio: Ricotta and Semolina Cake! It’s such a special recipe that brings warmth and comfort with every bite. Whether you’re celebrating a special occasion or simply indulging yourself, this cake is sure to impress. Enjoy your baking adventure, and don’t forget to share your creations with loved ones!
MIGLIACCIO: RICOTTA AND SEMOLINA CAKE
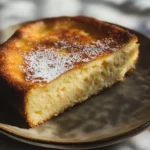
Indulge in the delightful flavors of MIGLIACCIO: RICOTTA AND SEMOLINA CAKE, a creamy Italian dessert that brings warmth and nostalgia with every bite. This cake combines the richness of ricotta cheese with the unique texture of semolina flour, resulting in a melt-in-your-mouth experience that’s perfect for any occasion.
- Prep Time: 15 minutes
- Cook Time: 60 minutes
- Total Time: 1 hour 15 minutes
- Yield: Serves 8
- Category: Dessert
- Method: Baking
- Cuisine: Italian
Ingredients
- 1 cup ricotta cheese
- 1 cup semolina flour
- 1 cup sugar
- 2 cups milk
- 3 large eggs
- 1 teaspoon vanilla extract
- 1 teaspoon baking powder
- Zest of 1 lemon
Instructions
- Preheat your oven to 350°F (175°C).
- In a large bowl, mix ricotta cheese, milk, eggs, vanilla extract, and lemon zest until smooth.
- In another bowl, whisk together semolina flour, sugar, and baking powder.
- Gradually combine the dry mixture into the wet mixture, stirring until just combined.
- Pour the batter into a greased cake pan and bake for about 60 minutes or until golden brown.
- Allow cooling for 15 minutes before transferring to a wire rack.
Nutrition
- Serving Size: 1 slice (90g)
- Calories: 210
- Sugar: 20g
- Sodium: 50mg
- Fat: 8g
- Saturated Fat: 4g
- Unsaturated Fat: 3g
- Trans Fat: 0g
- Carbohydrates: 30g
- Fiber: 1g
- Protein: 6g
- Cholesterol: 80mg