Cheesy Garlic Beef Roll-Ups
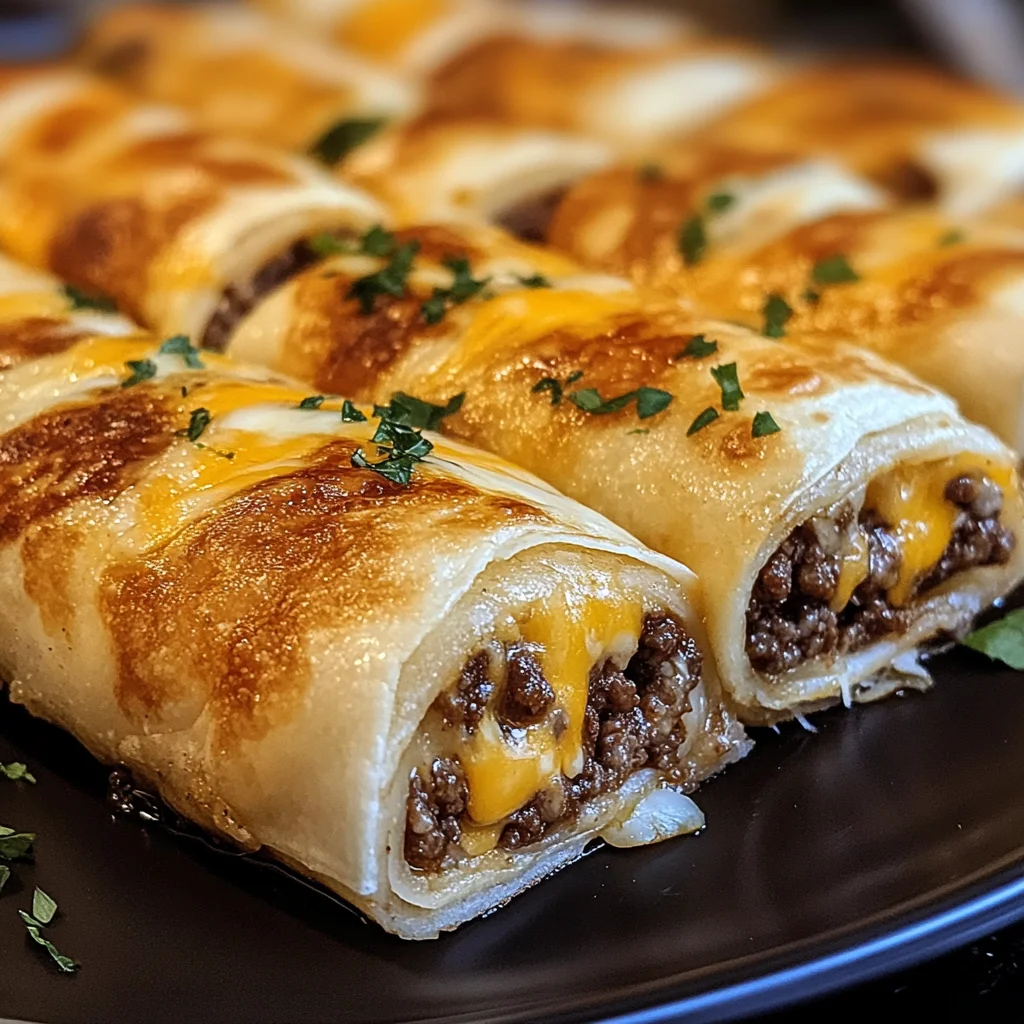
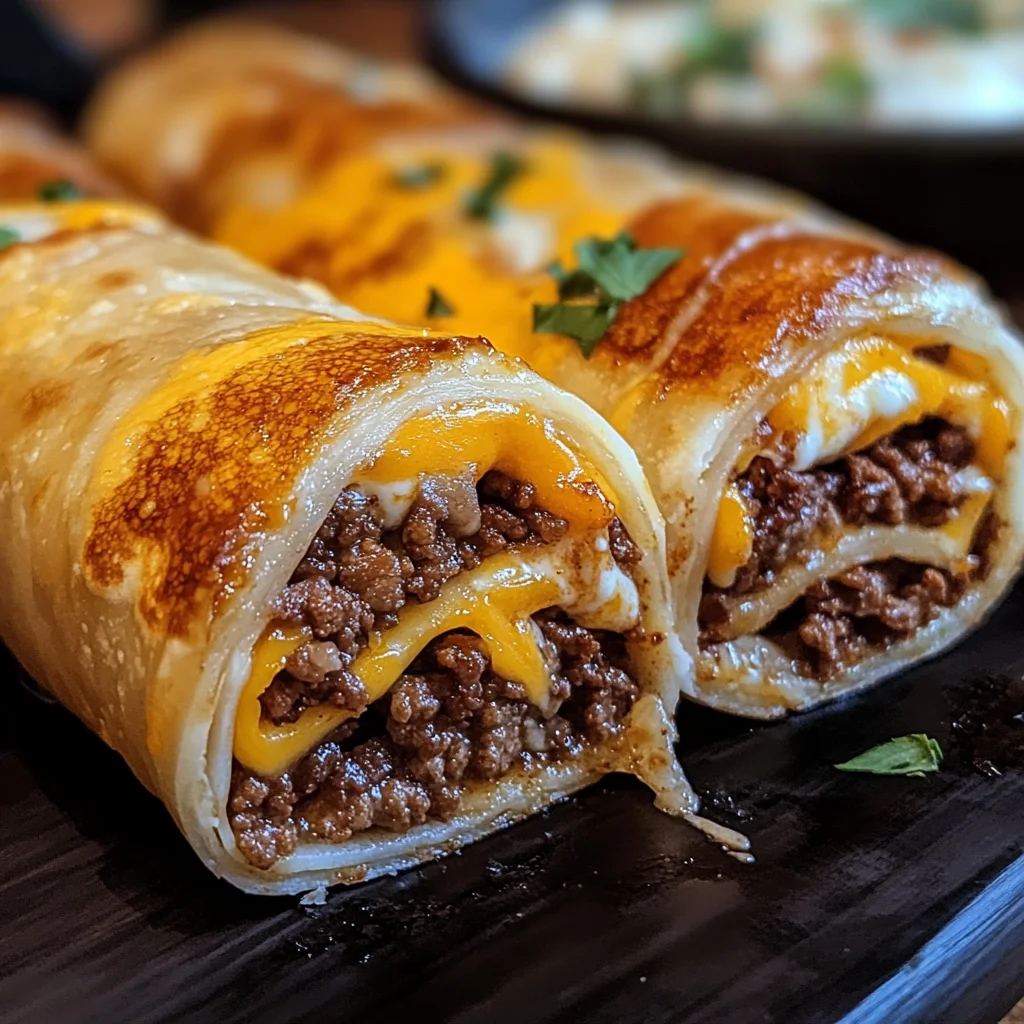
If you’re looking for a dish that’s both comforting and delicious, let me introduce you to my beloved Cheesy Garlic Beef Roll-Ups. These little treasures are perfect for busy weeknights or fun family gatherings. Packed with seasoned ground beef and melty cheese, they deliver all the cozy flavors we crave. Plus, they’re super easy to whip up, making them a go-to recipe in my kitchen!
These roll-ups are not only tasty but also versatile. Whether you serve them as an appetizer for friends or as a hearty main course for your family, they’re sure to be a hit. Trust me, once you try them, you’ll want to make them again and again!
Why You’ll Love This Recipe
- Quick to prepare: With just 30 minutes from start to finish, you can have a delicious meal on the table in no time.
- Family-friendly: Kids love cheesy goodness! These roll-ups are sure to please even the pickiest eaters.
- Customizable: Feel free to add your favorite ingredients or swap things out based on what you have on hand.
- Make-ahead option: You can prep these roll-ups in advance and bake them right before serving for a stress-free meal.
- Satisfying flavors: The combination of garlic butter and melted cheese makes each bite irresistible!
Ingredients You’ll Need
Let’s talk about the ingredients! This recipe uses simple, wholesome items that you probably already have in your pantry. Here’s what you’ll need:
For the Filling
- 1 lb ground beef
- ½ cup shredded cheddar cheese
- ½ cup shredded mozzarella cheese
- 1 tablespoon olive oil
- 1 tablespoon Worcestershire sauce
- 1 teaspoon onion powder
- 1 teaspoon garlic powder
- ½ teaspoon smoked paprika
- Salt and black pepper, to taste
For the Roll-Ups
- 4 large flour tortillas
For the Garlic Butter
- ¼ cup butter, melted
- 3 cloves garlic, minced
Optional Garnish
- Sliced pickles for garnish
Variations
This recipe is wonderfully flexible! Here are some fun variations to try:
- Swap the protein: Use ground turkey or chicken instead of beef for a lighter option.
- Add veggies: Toss in some finely chopped bell peppers or spinach into the beef mixture for extra nutrition.
- Change the cheese: Experiment with different cheeses like pepper jack or gouda for a unique twist.
- Make it spicy: If you like heat, add some diced jalapeños or red pepper flakes to the beef mixture.
How to Make Cheesy Garlic Beef Roll-Ups
Step 1: Preheat Your Oven
Start by preheating your oven to 375°F (190°C). Line a baking sheet with parchment paper or give it a light greasing. This step ensures that your roll-ups won’t stick and will come out beautifully golden.
Step 2: Cook the Beef
In a large skillet over medium-high heat, heat up the olive oil. Add in your ground beef and cook until it’s browned, about 7–8 minutes. Make sure to break it apart with a spatula as it cooks. This step is crucial because browning adds great flavor to your meat!
Step 3: Season It Up
Once the beef is cooked through, stir in Worcestershire sauce, onion powder, garlic powder, smoked paprika, salt, and pepper. Mix well and then remove it from heat. Letting this cool slightly before adding to tortillas helps prevent soggy wraps.
Step 4: Make the Garlic Butter
In a small bowl, combine melted butter with minced garlic. Stir this mixture well and set it aside. This garlic butter will bring an incredible aroma and flavor when brushed onto those roll-ups before baking.
Step 5: Assemble the Roll-Ups
Lay each tortilla flat on a clean surface. Evenly distribute the beef mixture over each tortilla first, followed by generous amounts of cheddar and mozzarella cheeses. Rolling these tightly while tucking in the sides keeps everything secure inside.
Step 6: Bake Them Up!
Place your rolled tortillas seam-side down on your prepared baking sheet. Brush them generously with that lovely garlic butter we made earlier. Bake for about 12–15 minutes until they turn golden brown and bubbly inside—this is where the magic happens!
Step 7: Slice and Serve
Let your cheesy garlic beef roll-ups cool slightly before slicing them into pinwheels if you’d like! Garnish with sliced pickles for an extra crunch and serve warm. Enjoy every gooey bite!
Pro Tips for Making Cheesy Garlic Beef Roll-Ups
These cheesy garlic beef roll-ups are not just delicious; they can also be super easy to make with a few helpful tips!
-
Use fresh ingredients: Opting for fresh garlic and high-quality cheeses can significantly enhance the flavor of your roll-ups, making them irresistibly tasty.
-
Don’t overfill the tortillas: Filling them just enough allows for easier rolling and prevents the filling from spilling out during baking, ensuring a neat presentation.
-
Customize the cheese blend: Feel free to mix in other types of cheese like pepper jack or gouda for an extra kick or different flavor profile. This versatility keeps things exciting!
-
Let them cool slightly before slicing: Allowing your roll-ups to sit for a few minutes after baking makes them easier to cut into pinwheels, resulting in cleaner edges and better presentation.
-
Serve immediately: Enjoy these roll-ups fresh out of the oven while the cheese is still melty and gooey. They taste best warm!
How to Serve Cheesy Garlic Beef Roll-Ups
Presentation is key when serving up these delightful roll-ups! Here are some creative ways to showcase your dish that will please both the eyes and taste buds.
Garnishes
- Chopped fresh parsley: A sprinkle of chopped parsley adds a pop of color and freshness that brightens up the dish.
- Sour cream or Greek yogurt: A dollop on the side offers a creamy contrast that complements the savory flavors beautifully.
Side Dishes
- Simple garden salad: A light salad with mixed greens, tomatoes, and cucumbers drizzled with a vinaigrette adds a refreshing crunch that balances the richness of the roll-ups.
- Guacamole: Creamy avocado dip pairs perfectly with the cheesy beef, providing a smooth texture contrast and enhancing the overall flavor experience.
- Corn on the cob: Grilled or boiled corn brushed with lime butter makes for a sweet and satisfying side that complements the savory roll-ups splendidly.
- Mexican rice: Fluffy rice seasoned with spices can serve as a hearty side, soaking up any extra flavors from your roll-ups while adding a filling element to your meal.
Enjoy making and sharing these cheesy garlic beef roll-ups with friends and family! They’re sure to become a favorite at your table.
Make Ahead and Storage
These cheesy garlic beef roll-ups are perfect for meal prep, allowing you to enjoy a delicious dish whenever you want! They store well and can be easily reheated for a quick snack or meal.
Storing Leftovers
- Allow the roll-ups to cool completely before storing.
- Place them in an airtight container in the refrigerator.
- Consume within 3–4 days for optimal freshness.
Freezing
- Wrap each roll-up individually in plastic wrap or aluminum foil.
- Place wrapped roll-ups in a freezer-safe bag or container.
- Freeze for up to 2 months. Label with the date for easy tracking.
Reheating
- Preheat your oven to 350°F (175°C).
- Unwrap the frozen roll-ups and place them on a baking sheet.
- Bake for about 15–20 minutes, or until heated through and crispy.
FAQs
Here are some common questions about Cheesy Garlic Beef Roll-Ups that might help you out!
Can I use a different type of meat for this recipe?
Yes! While ground beef is delicious, you can substitute it with ground turkey, chicken, or even plant-based meat alternatives for a different flavor profile.
How can I make Cheesy Garlic Beef Roll-Ups vegetarian?
To make these roll-ups vegetarian-friendly, replace the ground beef with sautéed vegetables like bell peppers, mushrooms, and spinach. Add more cheese for that cheesy goodness!
Can I prepare Cheesy Garlic Beef Roll-Ups in advance?
Absolutely! You can prepare these roll-ups ahead of time and store them in the refrigerator or freezer. Just reheat when you’re ready to enjoy!
What dipping sauces go well with Cheesy Garlic Beef Roll-Ups?
They pair wonderfully with salsa, ranch dressing, or guacamole for a tasty twist!
Final Thoughts
I hope you find joy in making these cheesy garlic beef roll-ups! They’re not just simple to whip up but also deliver comfort food vibes that everyone will love. Enjoy sharing them with family and friends—whether as an appetizer or a delightful main dish! Happy cooking!
Cheesy Garlic Beef Roll-Ups
Indulge in the comfort of Cheesy Garlic Beef Roll-Ups, a delightful dish that combines savory seasoned ground beef with melted cheese all wrapped up in soft tortillas. Perfect for busy weeknights or casual gatherings, these roll-ups are quick to prepare and sure to please everyone at the table. With just 30 minutes from start to finish, you can enjoy a satisfying meal that blends rich flavors with versatility. Customize them with your favorite ingredients or serve them alongside fresh sides for a complete dinner experience. Once you take a bite, you’ll see why these cheesy treats are bound to become a regular in your kitchen!
- Prep Time: 15 minutes
- Cook Time: 15 minutes
- Total Time: 30 minutes
- Yield: Approximately 4 servings 1x
- Category: Main
- Method: Baking
- Cuisine: Tex-Mex
Ingredients
- 1 lb ground beef
- ½ cup shredded cheddar cheese
- ½ cup shredded mozzarella cheese
- 4 large flour tortillas
- ¼ cup melted butter
- 3 cloves garlic, minced
- 1 tablespoon olive oil
- 1 teaspoon onion powder
- 1 teaspoon garlic powder
- ½ teaspoon smoked paprika
- Salt and black pepper, to taste
Instructions
- Preheat the oven to 375°F (190°C) and prepare a baking sheet.
- In a skillet, heat olive oil over medium-high heat and cook the ground beef until browned.
- Stir in Worcestershire sauce, onion powder, garlic powder, smoked paprika, salt, and pepper; remove from heat.
- Combine melted butter with minced garlic.
- Spread the beef mixture on each tortilla and top with cheese. Roll tightly.
- Place seam-side down on the baking sheet and brush with garlic butter.
- Bake for 12–15 minutes until golden brown.
Nutrition
- Serving Size: 1 roll-up (100g)
- Calories: 290
- Sugar: 1g
- Sodium: 480mg
- Fat: 19g
- Saturated Fat: 9g
- Unsaturated Fat: 10g
- Trans Fat: 0g
- Carbohydrates: 18g
- Fiber: 1g
- Protein: 14g
- Cholesterol: 50mg

