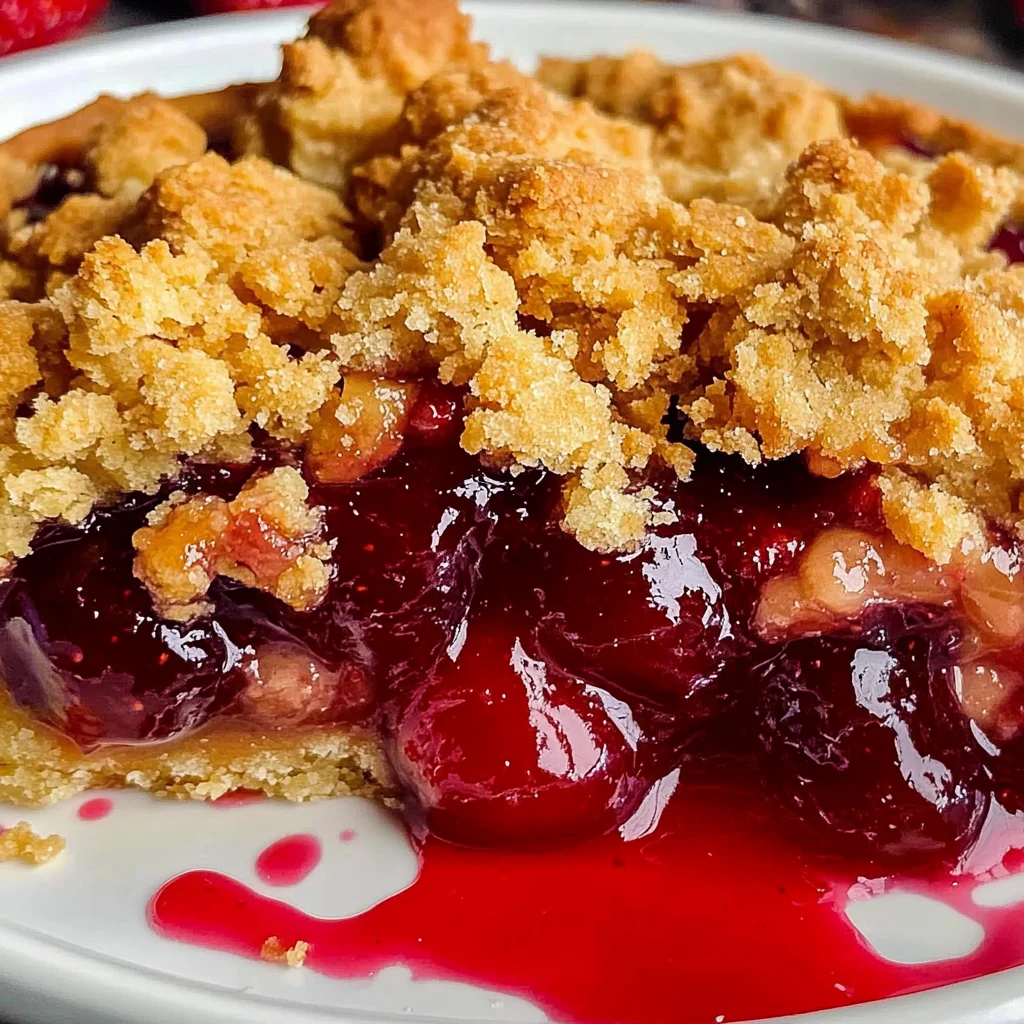
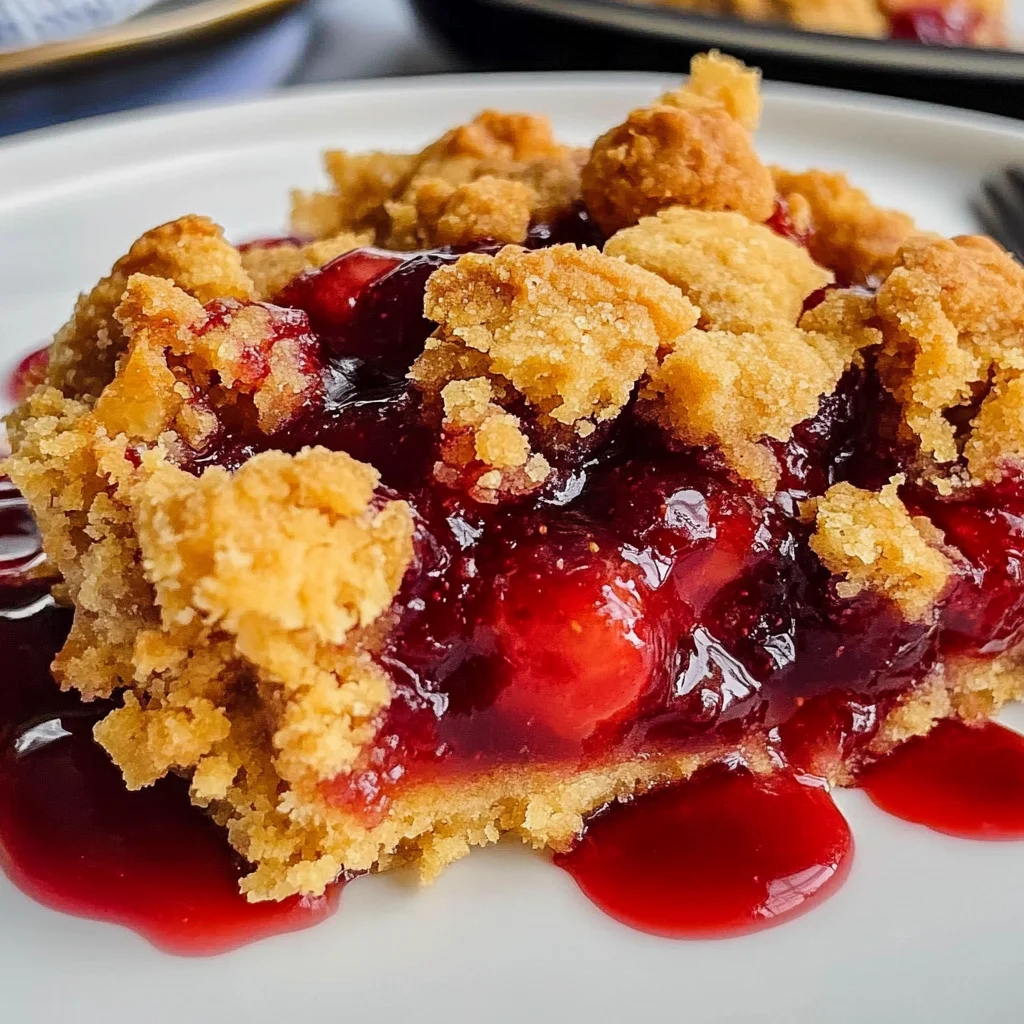
Peanut Butter and Jelly Cobbler
If you’re looking for a dessert that’s as comforting as a warm hug, you’ve come to the right place! This Peanut Butter and Jelly Cobbler is not only delicious but also incredibly easy to make. With just three simple ingredients, it’s perfect for busy weeknights or family gatherings when you want something sweet without a lot of fuss. Trust me; your loved ones will be asking for seconds!
What I love most about this recipe is how it combines the classic flavors of peanut butter and jelly into a delightful cobbler. It’s a nostalgic treat that brings back memories of childhood lunches, all while being a fabulous dessert option. Let’s dive in and discover why this dish is sure to become a favorite in your home!
Why You’ll Love This Recipe
- Quick and Easy: With only three ingredients, you can whip this up in no time—perfect for those last-minute dessert cravings!
- Family-Friendly: Everyone loves peanut butter and jelly! This cobbler will bring smiles to faces young and old.
- Make-Ahead Convenience: You can prepare it ahead of time and simply pop it in the oven when you’re ready to serve.
- Deliciously Indulgent: The combination of gooey strawberry filling with a warm peanut butter topping creates an irresistible flavor bomb.
Ingredients You’ll Need
This Peanut Butter and Jelly Cobbler uses simple, wholesome ingredients that you may already have on hand. Let’s take a look at what you need:
For the Cobbler
- 2 x 21 oz cans of strawberry pie filling
- 17.5 oz package peanut butter cookie mix
- 1/2 cup butter, melted
These ingredients come together beautifully to create a dessert that everyone will love!
Variations
One of the best things about this recipe is its flexibility! Feel free to get creative with these fun variations:
- Try Different Fruit Fillings: Swap out strawberry pie filling for raspberry or cherry for a new twist.
- Add Chocolate Chips: Mix in some chocolate chips with the cookie dough for an extra indulgent treat.
- Use Gluten-Free Cookie Mix: If you’re gluten-sensitive, opt for a gluten-free cookie mix—this recipe can easily accommodate dietary needs.
- Top with Ice Cream: Serve warm with your favorite non-dairy ice cream on top for an even more decadent experience.
How to Make Peanut Butter and Jelly Cobbler
Step 1: Preheat Your Oven
Before anything else, preheat your oven to 375F. This step is crucial as it ensures your cobbler bakes evenly and gets that perfect golden-brown topping.
Step 2: Prepare the Pie Filling
Pour both cans of strawberry pie filling into a 9 x 13 inch baking dish and spread it out evenly. This fruity layer acts as the delicious base of our cobbler, adding sweetness and moisture.
Step 3: Combine Cookie Mix and Butter
In a mixing bowl, pour the cookie dough mix and melted butter. Stir until fully combined. This mixture will form the crumbly topping that contrasts nicely with the soft fruit beneath.
Step 4: Sprinkle the Dough Over Filling
Sprinkle the cookie dough in small clumps over the pie filling. Covering it as evenly as possible helps ensure every bite has both peanut butter goodness and sweet strawberry flavor.
Step 5: Bake Until Golden Brown
Place your baking dish in the oven and bake until the peanut butter cookie topping is nicely browned—about 35 to 40 minutes. The aroma that fills your kitchen during this time is simply heavenly!
Step 6: Cool Slightly Before Serving
Once done, remove the dish from the oven and allow it to cool slightly. This waiting period makes serving easier while still keeping that warm comfort feel.
Step 7: Enjoy!
Serve while warm and enjoy every delightful bite of your Peanut Butter and Jelly Cobbler! Whether it’s after dinner or at a family gathering, this dessert is sure to please everyone at your table.
Pro Tips for Making Peanut Butter and Jelly Cobbler
Making Peanut Butter and Jelly Cobbler is a breeze, but these pro tips will help you elevate your dessert game even further!
-
Use fresh ingredients: Opt for high-quality strawberry pie filling to enhance the flavor of your cobbler. Fresh or homemade fillings can give you a more vibrant taste.
-
Don’t skip the cooling step: Allowing the cobbler to cool slightly before serving helps the layers set, making it easier to slice and serve without falling apart.
-
Experiment with toppings: For added texture, consider sprinkling crushed nuts or granola over the cookie layer before baking. This adds a delightful crunch that complements the soft filling.
-
Adjust sweetness if needed: If you prefer a less sweet dessert, you can reduce the amount of butter slightly or choose a natural peanut butter that isn’t sweetened.
-
Store leftovers properly: Keep any leftover cobbler in an airtight container in the fridge. It can last up to three days and makes for a delicious reheat!
How to Serve Peanut Butter and Jelly Cobbler
Serving Peanut Butter and Jelly Cobbler is as fun as making it! Here are some ideas to make your dessert even more enjoyable for yourself and your guests.
Garnishes
-
Whipped Coconut Cream: A dollop of whipped coconut cream adds a luscious, dairy-free touch that pairs beautifully with the rich flavors of peanut butter and jelly.
-
Chopped Fresh Strawberries: Fresh strawberries not only enhance the presentation but also add a burst of freshness that complements the cobbler’s sweetness.
Side Dishes
-
Vanilla Ice Cream: A scoop of vanilla ice cream provides a delightful contrast to the warm cobbler, creating a classic combination that’s hard to resist.
-
Fruit Salad: A refreshing fruit salad with seasonal berries can balance out the richness of the cobbler while adding color to your plate.
-
Yogurt Parfait: Layer yogurt with granola and fresh fruit for a light side dish that offers creamy goodness alongside your dessert without overwhelming it.
With these tips and serving suggestions, your Peanut Butter and Jelly Cobbler will be sure to impress everyone at your table! Enjoy every bite!
Make Ahead and Storage
This Peanut Butter and Jelly Cobbler is a fantastic option for meal prep! You can easily make it ahead of time, allowing the flavors to meld beautifully, and store it for later enjoyment.
Storing Leftovers
- Allow the cobbler to cool completely before storing.
- Place it in an airtight container in the refrigerator.
- Enjoy leftovers within 3-4 days for the best taste.
Freezing
- Cool the cobbler completely before freezing.
- Wrap individual portions tightly in plastic wrap or foil, then place them in a freezer-safe container.
- This dessert can be frozen for up to 2 months.
Reheating
- Thaw frozen portions in the refrigerator overnight before reheating.
- Preheat your oven to 350°F (175°C).
- Place the cobbler in an oven-safe dish and warm for about 15-20 minutes, or until heated through. You can also microwave individual servings for quicker reheating.
FAQs
Here are some common questions you might have about making your Peanut Butter and Jelly Cobbler:
Can I use other pie fillings for this Peanut Butter and Jelly Cobbler?
Absolutely! While strawberry pie filling is delightful, feel free to experiment with other flavors like blueberry or cherry to suit your taste preferences.
How do I make my Peanut Butter and Jelly Cobbler gluten-free?
To make this recipe gluten-free, simply use a gluten-free peanut butter cookie mix. The rest of the ingredients are naturally gluten-free!
Can I add toppings to my Peanut Butter and Jelly Cobbler?
Yes! Consider adding whipped coconut cream or a scoop of dairy-free ice cream on top for an extra delicious treat.
What should I serve with Peanut Butter and Jelly Cobbler?
This cobbler pairs wonderfully with a scoop of vanilla ice cream or a dollop of whipped cream. It’s perfect for gatherings!
How long does it take to prepare Peanut Butter and Jelly Cobbler?
This easy recipe only takes about 8 minutes to prepare, making it a quick dessert option when you’re short on time!
Final Thoughts
I hope you find joy in making this Peanut Butter and Jelly Cobbler as much as I do! It’s simple, delicious, and will surely bring smiles all around the table. Don’t hesitate to try out different pie fillings or toppings – make it your own! Enjoy every bite, and happy baking!
Peanut Butter and Jelly Cobbler

Indulge in the comforting flavors of Peanut Butter and Jelly Cobbler, a delightful dessert that captures the essence of childhood in every bite. This easy-to-make cobbler features a luscious strawberry filling topped with a warm, crumbly peanut butter cookie layer. With just three simple ingredients, it’s perfect for family gatherings or a cozy weeknight treat. Not only is this dessert quick to prepare, but it also allows for endless variations—mix in different fruit fillings or add chocolate chips for an extra twist. Serve it warm with a scoop of your favorite non-dairy ice cream or a dollop of whipped coconut cream for a deliciously nostalgic experience that everyone will love.
- Prep Time: 8 minutes
- Cook Time: 40 minutes
- Total Time: 48 minutes
- Yield: Approximately 12 servings 1x
- Category: Dessert
- Method: Baking
- Cuisine: American
Ingredients
- 2 x 21 oz cans of strawberry pie filling
- 17.5 oz package peanut butter cookie mix
- 1/2 cup butter, melted
Instructions
- Preheat your oven to 375°F (190°C).
- Pour both cans of strawberry pie filling into a 9 x 13 inch baking dish, spreading evenly.
- In a mixing bowl, combine the cookie dough mix with melted butter until fully mixed.
- Sprinkle the cookie mixture over the strawberry filling evenly.
- Bake for 35 to 40 minutes until the topping is golden brown.
- Allow to cool slightly before serving warm.
Nutrition
- Serving Size: 1 piece (approximately 106g)
- Calories: 305
- Sugar: 24g
- Sodium: 207mg
- Fat: 15g
- Saturated Fat: 7g
- Unsaturated Fat: 8g
- Trans Fat: 0g
- Carbohydrates: 39g
- Fiber: 1g
- Protein: 4g
- Cholesterol: 15mg